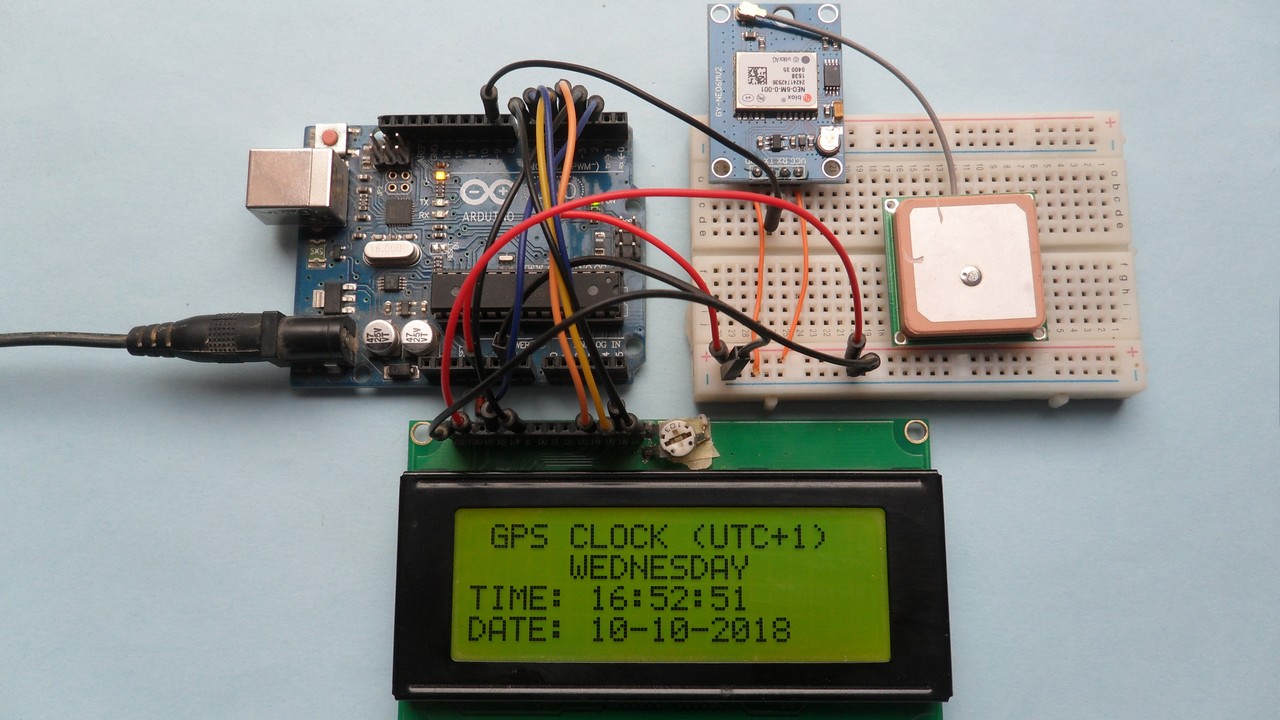
This Arduino project shows how to build a GPS clock with local time adjustment (UTC time + offset) using Arduino UNO board and NEO-6M GPS module. Time and date are displayed on 20×4 LCD screen.
In this project the Arduino receives time data (UTC time) from the GPS module (the GPS module receives data from satellites) and prints it on the 20×4 LCD.
Related Projects:
The following project link shows a simple interfacing of Arduino with NEO-6M GPS module in order to get position, time, date and speed:
Interfacing Arduino with NEO-6M GPS module
and the following project shows how to build a GPS clock with UTC time only:
Arduino GPS real time clock with NEO-6M module
Hardware Required:
To build this project the following components are needed:
- Arduino (or compatible) board
- NEO-6M GPS module
- 20×4 LCD screen
- 10k ohm variable resistor (or potentiometer)
- 330 ohm resistor
- Breadboard
- Jumper wires
Arduino GPS clock with local time using NEO-6M module circuit:
Project circuit diagram is shown below.
The LCD is 2004 (20×4) not 1602!
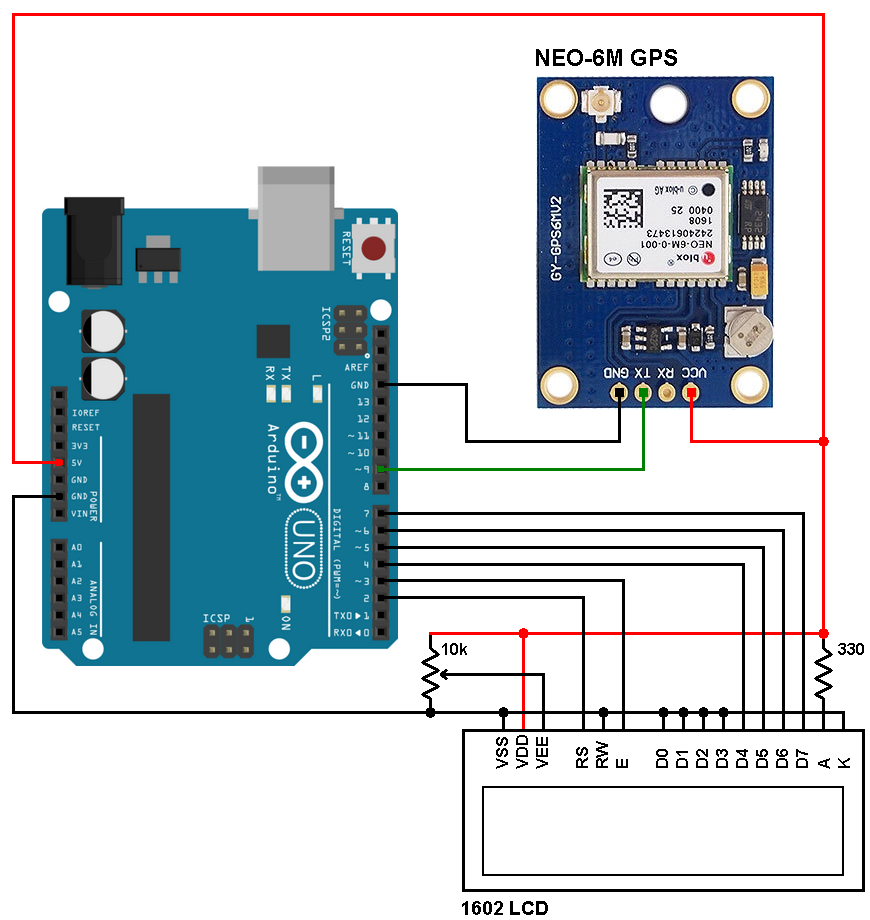
NEO-6M GPS module has 4 pins where:
NEO-6M GPS board GND pin goes to Arduino GND
TX pin goes to Arduino digital pin 9
RX pin is not connected
VCC pin goes to Arduino 5V pin (can be connected to 3.3V pin)
The 2004 LCD screen is used to display the real time clock time and date where:
RS —> Arduino digital pin 2
E —> Arduino digital pin 3
D4 —> Arduino digital pin 4
D5 —> Arduino digital pin 5
D6 —> Arduino digital pin 6
D7 —> Arduino digital pin 7
VSS, RW, D0, D1, D2, D3 and K are connected to Arduino GND (ground)
VEE to the variable resistor (or potentiometer) output
VDD to Arduino 5V and A to Arduino 5V through 330 ohm resistor
VEE pin is used to control the contrast of the LCD. A (anode) and K (cathode) are the back light LED pins.
Arduino GPS clock code:
The Arduino code below uses TinyGPS++ library, it can be downloaded from the link below. After downloading the library, unzip the folder and add it to Arduino libraries folder (for example: C:\Program Files\Arduino\libraries). You should rename the folder “TinyGPSPlus”.
TinyGPS++ Library —-> direct link
Another library is used in this project which is Arduino Time library, with this library we can easily get our local time.
First we extract the UTC time from the TinyGPS++ library (seconds, minutes, hours, day of month, month and year). After that we apply the UTC time to the Arduino time library and add time offset to it as shown below:
1 2 3 4 | // set current UTC time setTime(Hour, Minute, Second, Day, Month, Year); // add the offset to get local time adjustTime(time_offset); |
Finally our local time is ready to use and we can get it using the following functions:
1 2 3 4 5 6 7 | second(); // get seconds minute(); // get minutes hour(); // get hours weekday(); // get day of the week with Sunday = 1 day(); // get day of the month month(); // get month with January = 1 year(); // get year |
Download links are below:
Arduino Time Library —-> direct link
The time offset is defined as:
1 | #define time_offset 3600 // define a clock offset of 3600 seconds (1 hour) ==> UTC + 1 |
Full Arduino code:
1 2 3 4 5 6 7 8 9 10 11 12 13 14 15 16 17 18 19 20 21 22 23 24 25 26 27 28 29 30 31 32 33 34 35 36 37 38 39 40 41 42 43 44 45 46 47 48 49 50 51 52 53 54 55 56 57 58 59 60 61 62 63 64 65 66 67 68 69 70 71 72 73 74 75 76 77 78 79 80 81 82 83 84 85 86 87 88 89 90 91 92 93 94 95 96 97 98 99 100 101 102 103 104 105 106 107 108 109 110 111 112 113 114 115 116 117 118 119 120 | /* * Arduino GPS clock with local time using NEO-6M module and 20x4 LCD. * This is a free software with NO WARRANTY. * http://simple-circuit.com/ */ #include <TinyGPS++.h> // include TinyGPS++ library #include <TimeLib.h> // include Arduino time library #include <SoftwareSerial.h> // include software serial library #include <LiquidCrystal.h> // include LCD library TinyGPSPlus gps; #define S_RX 9 // define software serial RX pin #define S_TX 8 // define software serial TX pin SoftwareSerial SoftSerial(S_RX, S_TX); // configure SoftSerial library // LCD module connections (RS, E, D4, D5, D6, D7) LiquidCrystal lcd(2, 3, 4, 5, 6, 7); #define time_offset 3600 // define a clock offset of 3600 seconds (1 hour) ==> UTC + 1 // variable definitions char Time[] = "TIME: 00:00:00"; char Date[] = "DATE: 00-00-2000"; byte last_second, Second, Minute, Hour, Day, Month; int Year; void setup(void) { SoftSerial.begin(9600); // initialize software serial at 9600 baud // set up the LCD's number of columns and rows lcd.begin(20, 4); lcd.setCursor(1, 0); // move LCD cursor to column 1, row 0 [upper left position (0, 0)] lcd.print("GPS CLOCK (UTC+1)"); } void loop() { while (SoftSerial.available() > 0) { if (gps.encode(SoftSerial.read())) { // get time from GPS module if (gps.time.isValid()) { Minute = gps.time.minute(); Second = gps.time.second(); Hour = gps.time.hour(); } // get date drom GPS module if (gps.date.isValid()) { Day = gps.date.day(); Month = gps.date.month(); Year = gps.date.year(); } if(last_second != gps.time.second()) // if time has changed { last_second = gps.time.second(); // set current UTC time setTime(Hour, Minute, Second, Day, Month, Year); // add the offset to get local time adjustTime(time_offset); // update time array Time[12] = second() / 10 + '0'; Time[13] = second() % 10 + '0'; Time[9] = minute() / 10 + '0'; Time[10] = minute() % 10 + '0'; Time[6] = hour() / 10 + '0'; Time[7] = hour() % 10 + '0'; // update date array Date[14] = (year() / 10) % 10 + '0'; Date[15] = year() % 10 + '0'; Date[9] = month() / 10 + '0'; Date[10] = month() % 10 + '0'; Date[6] = day() / 10 + '0'; Date[7] = day() % 10 + '0'; // print time & date print_wday(weekday()); // print day of the week lcd.setCursor(0, 2); // move cursor to column 0 row 2 lcd.print(Time); // print time (HH:MM:SS) lcd.setCursor(0, 3); // move cursor to column 0 row 3 lcd.print(Date); // print date (DD-MM-YYYY) } } } } // function for displaying day of the week void print_wday(byte wday) { lcd.setCursor(5, 1); // move cursor to column 5, row 1 switch(wday) { case 1: lcd.print(" SUNDAY "); break; case 2: lcd.print(" MONDAY "); break; case 3: lcd.print(" TUESDAY "); break; case 4: lcd.print("WEDNESDAY"); break; case 5: lcd.print("THURSDAY "); break; case 6: lcd.print(" FRIDAY "); break; default: lcd.print("SATURDAY "); } } // end of code. |
The result of this project should be as shown in the following video where PIC16F877A is used instead of the Arduino UNO board:
Discover more from Simple Circuit
Subscribe to get the latest posts sent to your email.


Is there code to get the offset from GPS coordinates? A library or something?
Agree!
Hi date :31-12-2099 why?I can not solve the problem.Thanks
Hi Everybody, I fixed it, now everything is correctly working UTC Time and Date.
Hi Susan
When you say you fixed it, you can say what you did to fix it, if not, to the readers, it’s no use writing here!
Hi Dear, Good project all works perfect. I only have one problem to change Time zone UTC -7 to local Pacific Time. I tried, but only UTC changed, now shows UTC -7, but the time and date not. I need some help to adjust this in the code. Anyone Please.Thank you
Hello sir. could you briefly explain to me and everyone here what is happening in the update time and date array section. I’m trying to wrap my head around this part as it is confusing for me ?
Great Code ! Thanks ! Modified it for use with I2C 20×4 LCD and Maidenhead Locator calculation for Ham Radio use.
Hi Luke
Please tell me how to modify the code to us 12C LCD display.
Thanks
Thank you very much indeed. Your sketch was of great help to me.
Regards.
What changes to the code would be needed to display UTC on one line and local time instead of the date?
OK it worked; thank you very much
Thank you sooo much for this one, did make a small mod to use it for a 16/2 display, and RX/TX pin to 3/2, and it did
came right up 🙂
Hi, how did you do the daptación? I also have a 16×2 display and needed this sketch (Time and Date with offset from the time zone [-3]); Can you share with me?
(meuviolino@hotmail.com)
Thank you
Time and date are respectively printed on 3rd and 4th row, only day of week is printed on 2nd row. This means you’ve to make your own modifications in order to work with 16×2 LCD (for example print time on 1st row and date on 2nd row).