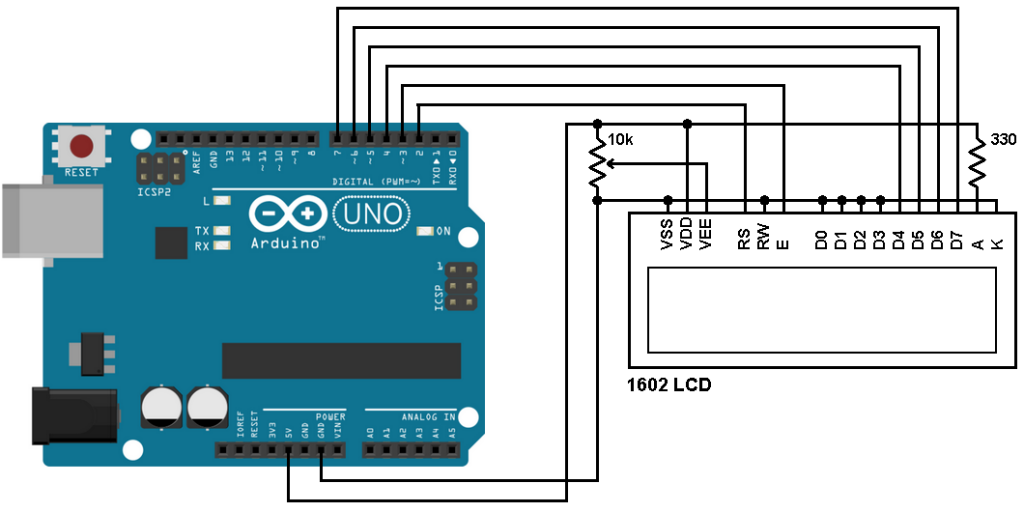
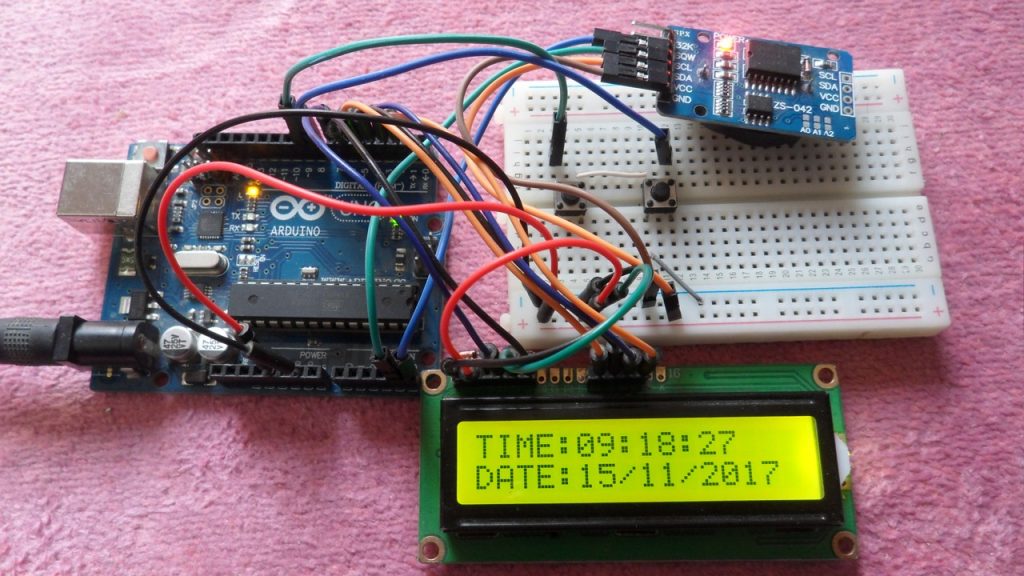
This small post shows a simple example of an interfacing of Arduino UNO board with LCD screen.
The Arduino can easily control LCDs equipped with the Hitachi HD44780 or compliant controller using its LiquidCrystal library which makes this interfacing is one of the easiest Arduino projects. The link below has more details about this library:
https://www.arduino.cc/en/Reference/LiquidCrystal
Hardware Required:
- Arduino UNO board
- 1602 LCD screen
- 10K ohm variable resistor
- 330 ohm resistor
- Jumper wires
Interfacing Arduino UNO with LCD circuit:
The LCD is connected with the Arduino through 6 pins: RS (register seect), E (enable), D4, D5, D6 and D7 (serial data pins). The A (anode) and K (cathode) are backlight LED pins which gives light to our LCD, it is connected to +5V through 330 ohm resistor.
The Code:
1 2 3 4 5 6 7 8 9 10 11 12 13 14 15 16 17 18 19 20 21 22 23 24 25 26 27 28 29 | // Interfacing Arduino with LCD example // include the library code #include <LiquidCrystal.h> // LCD is connected to Arduino as: LiquidCrystal lcd(RS, E, D4, D5, D6, D7) LiquidCrystal lcd(2, 3, 4, 5, 6, 7); byte i; void setup() { // Set up the LCD's number of columns and rows: lcd.begin(16, 2); // Set the cursor to column 6, line 1 lcd.setCursor(2, 0); // Print a message to the LCD. lcd.print("Hello world!"); for(i = 0; i < 200; i++){ // Set the cursor to column 6, line 1 lcd.setCursor(6, 1); // Print i lcd.print(i); delay(500); } } void loop() { // Empty endless loop ; } |
Discover more from Simple Circuit
Subscribe to get the latest posts sent to your email.


What an informative and engaging blog post! As a hobbyist Arduino enthusiast, I’m always looking for practical and straightforward tutorials to expand my knowledge and improve my projects. “Arduino LCD Example” on Simple-Circuit.com is truly a gem.