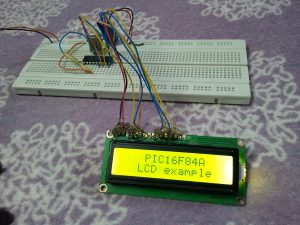
It is easy to interface LCD displays with PIC16F84A microcontroller using CCS PIC C compiler since the compiler has its driver.
There are 7 data lines between the microcontroller and the LCD display which are: RS, R/W, E, D4, D5, D6 and D7. The following PIC16F84A LCD example shows how to connect the LCD screen with the microcontroller and how to display characters using CCS C compiler.
Interface PIC16F84A with LCD circuit:
The following circuit schematic shows the required connection between PIC16F84A microcontroller and the LCD display.
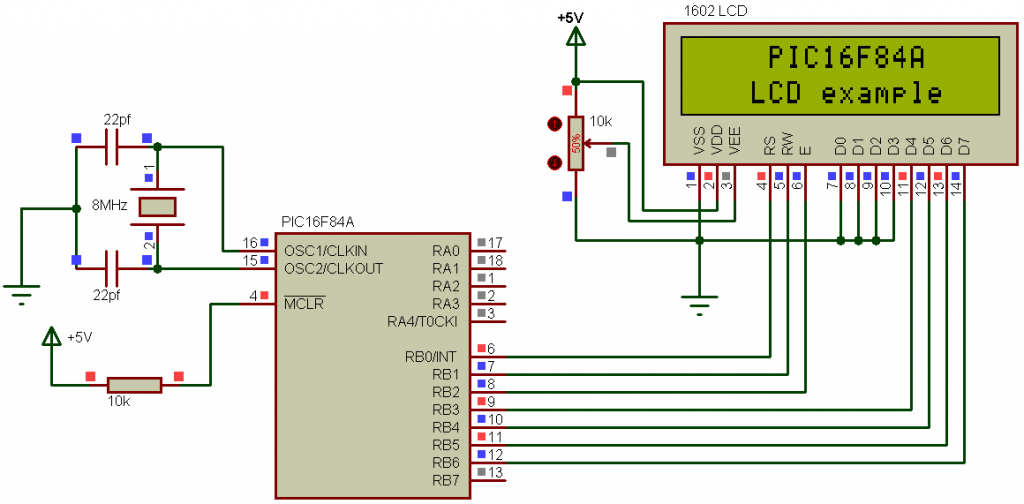
The PIC16F84A microcontroller must be supplied with 5V between pins VDD (#14) and VSS (#5).
Interface PIC16F84A with LCD CCS C code:
1 2 3 4 5 6 7 8 9 10 11 12 13 14 15 16 17 18 19 20 21 22 23 24 25 26 27 28 29 30 31 32 33 34 35 36 37 38 | // Interfacing PIC16F84A with LCD display CCS C code //LCD module connections #define LCD_RS_PIN PIN_B0 #define LCD_RW_PIN PIN_B1 #define LCD_ENABLE_PIN PIN_B2 #define LCD_DATA4 PIN_B3 #define LCD_DATA5 PIN_B4 #define LCD_DATA6 PIN_B5 #define LCD_DATA7 PIN_B6 //End LCD module connections #include <16F84A.h> #fuses HS,NOWDT,PUT,NOPROTECT #use delay(crystal=8000000) #include <lcd.c> unsigned int8 i = 0; void main() { lcd_init(); // Initialize LCD module lcd_gotoxy(5, 1); // Go to column 5 row 1 lcd_putc("PIC16F84A"); lcd_gotoxy(4, 2); // Go to column 4 row 2 lcd_putc("LCD example"); delay_ms(5000); lcd_putc('f'); // LCD clear lcd_gotoxy(3, 1); // Go to column 3 row 1 lcd_putc("Hello world!"); while(TRUE) { lcd_gotoxy(7, 2); printf(lcd_putc,"%3u",i); // Write i with 3 numbers max i++; // Increment i by 1 if(i > 100) i = 1; delay_ms(200); } } |
Interface PIC16F84A with LCD video:
Discover more from Simple Circuit
Subscribe to get the latest posts sent to your email.
My in-blued library do not work when i burn code in MCU the MCU getting stuck but in Proteus simulation every think as well please help me .