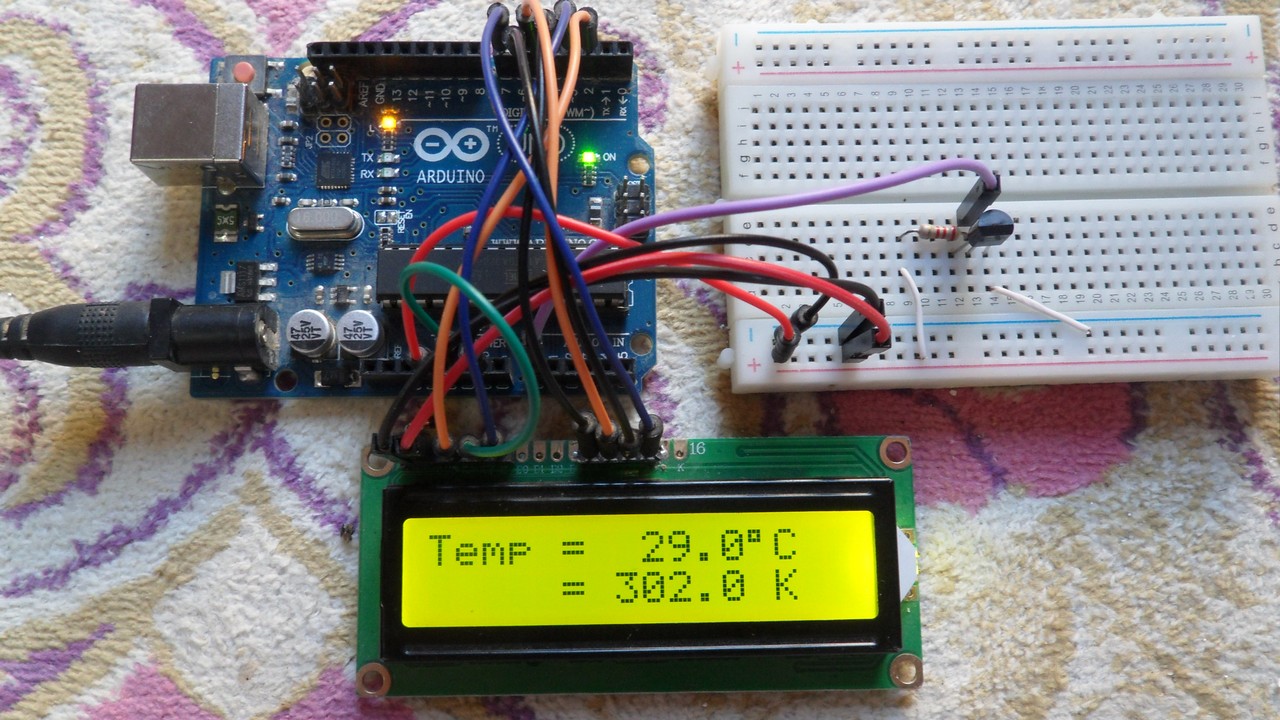
This post shows how to build a digital thermometer using Arduino and LM335 analog temperature sensor.
Simply, the LM335 is a 3-pin device (like a transistor) which converts temperature into analog voltage. This sensor requires an ADC (Analog-to-Digital) module in order to convert the analog voltage into digital data.
The LM335 temperature sensor has the following features (from the datasheet):
- Directly Calibrated to the Kelvin Temperature Scale
- 1°C Initial Accuracy Available
- Operates from 400 μA to 5 mA
- Less than 1-Ω Dynamic Impedance
- Easily Calibrated
- Wide Operating Temperature Range
- 200°C Overrange
- Low Cost
The LM335 has a breakdown voltage directly proportional to absolute temperature at 10 mV/°K. If the LM335 output voltage for example is 3.03 (3030 mV) that means the temperature is: 303 °Kelvin = 30 °Celsius.
Hardware Required:
- Arduino board
- LM335 Temperature sensor – datasheet
- 16×2 LCD
- 10K ohm variable resistor (or potentiometer)
- 2.2K ohm resistor
- Breadboard
- Jumper wires
Arduino + LM335 sensor circuit:
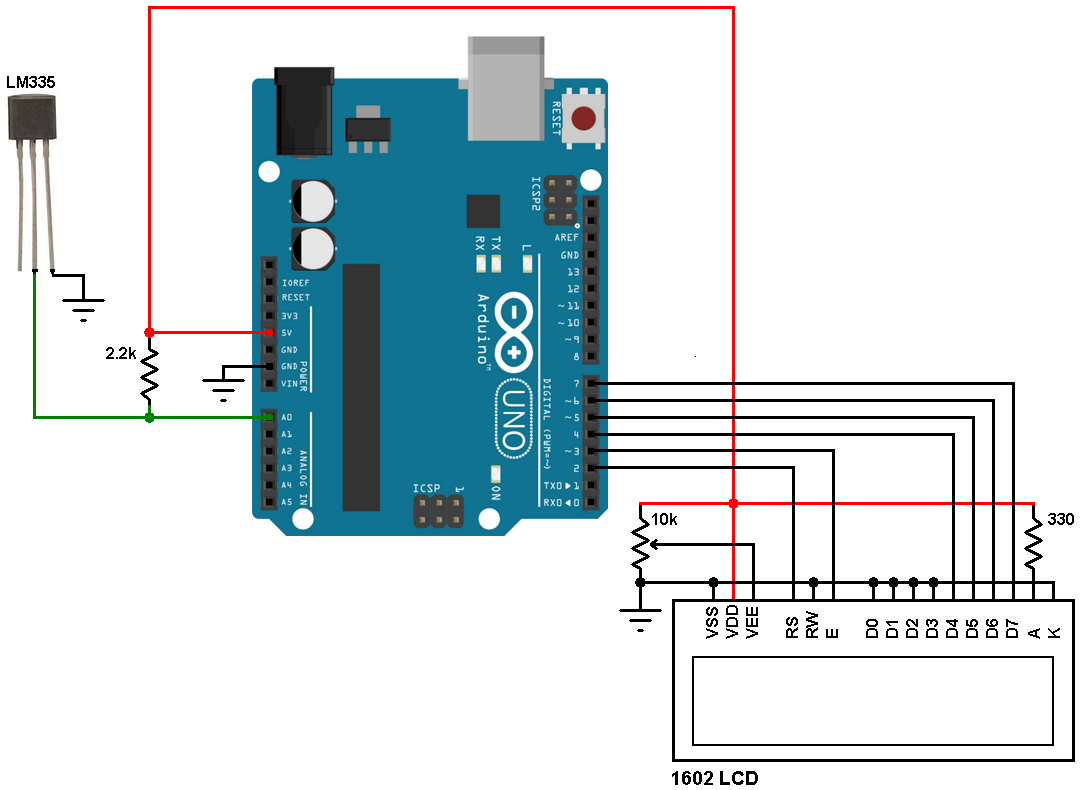
The LM335 sensor has 3 pins (from left to right):
Pin 1 for calibration, not used in this example
Pin 2: output
Pin 3: GND (ground).
The output pin of the LM335 sensor is connected to analog channel 0 (A0). I chose the 2.2K ohm because as written in the datasheet for optimum accuracy the current flows through the LM335 should be 1mA. For example if the temperature = 27°C, the LM335 output voltage will be 3.00V and assume the supply voltage is exactly 5.00V that means the current flows through the sensor is ( 5 – 3)/2.2 = 0.90mA which is good enough. Also the value 2.2K is a standard value and well used.
Arduino + LM335 sensor code:
Arduino ADC module is used with 10-bit resolution which means the digital value of the input analog voltage varies between 0 (0V) and 1023 (5V). By multiplying the digital value by 0.489 we get the temperature in Kelvin (0.489 = 500/1023). The temperature in degree Celsius = Kelvin – 273.
Example full code is the one below.
1 2 3 4 5 6 7 8 9 10 11 12 13 14 15 16 17 18 19 20 21 22 23 24 25 26 27 28 29 30 31 32 33 34 35 36 37 38 39 40 | // Digital thermometer with Arduino and LM335 temperature sensor // include LCD library code #include <LiquidCrystal.h> #define LM335_pin 0 // LM335 output pin is connected to Arduino A0 pin // LCD module connections (RS, E, D4, D5, D6, D7) LiquidCrystal lcd(2, 3, 4, 5, 6, 7); void setup() { // set up the LCD's number of columns and rows lcd.begin(16, 2); } char message1[] = "Temp = 00.0 C"; char message2[] = "= 00.0 K"; int Kelvin, Celsius; void loop() { delay(1000); // Wait 1s between readings Kelvin = analogRead(LM335_pin) * 0.489; // Read analog voltage and convert it to Kelvin (0.489 = 500/1023) Celsius = Kelvin - 273; // Convert Kelvin to degree Celsius if(Celsius < 0){ Celsius = abs(Celsius); // Absolute value message1[7] = '-'; // Put minus '-' sign } else message1[7] = ' '; // Put space ' ' if (Celsius > 99) message1[7] = '1'; // Put 1 (of hundred) message1[8] = (Celsius / 10) % 10 + 48; message1[9] = Celsius % 10 + 48; message1[12] = 223; // Put degree symbol message2[2] = (Kelvin / 100) % 10 + 48; message2[3] = (Kelvin / 10) % 10 + 48; message2[4] = Kelvin % 10 + 48; lcd.setCursor(0, 0); lcd.print(message1); lcd.setCursor(5, 1); lcd.print(message2); } |
The video below shows the Proteus simulation of the example:
Downloads:
To be able to simulate this example, Proteus needs the Arduino library which can be downloaded from the link below. After extracting the files (ARDUINO.IDX and ARDUINO.LIB) put it in the Library folder (ex: C:\Program Files\Labcenter Electronics\Proteus 8 Professional\LIBRARY):
Download
Arduino + LM335 sensor Proteus simulation file download:
Download
Discover more from Simple Circuit
Subscribe to get the latest posts sent to your email.


I’ve noticed that if i power this scheme from PC USB it shows 27 Celsius. If I power it from powerbank usb it shows 20 Celsius, and if I power it with 9V battery it shows 23 Celsius. Real room temperature is 25.7 Celsius (via Xiaomi Mijia bluetooth thermometer 2). The fluctuations of temperature is to big. I see a direct dependence of temperature readings on the applied voltage. It shouldnt be so. Do you have any idea how this can be fixed?
There is a mistake: togfet the smallest step for the AD cionverter in Arduino you have to calculate 5V/1024 and not 5V/1023!
It should be 1023, as that is the highest value you can reach with 10 bits.
Of course you get 1024 different values with 10 bits, but one of those is 0, which you do not consider in this case.
You really can’t use a 3v supply, as the output of the lm335 is usually greater than 3v. Went thru this myself. 🙁
What value resistor should I use if my supply voltage is 3V?