This post shows how to work with the 3-wire LCD library for CCS PIC C compiler which discussed in the following topic:
3-Wire LCD driver for CCS PIC C compiler
The microcontroller used in this project is PIC16F877A and the shift register is 74HC595 but other serial-in parallel-out types can be used such as 74HC164 or HEF4094.
By adding a shift register we can make a cheap serial LCD.
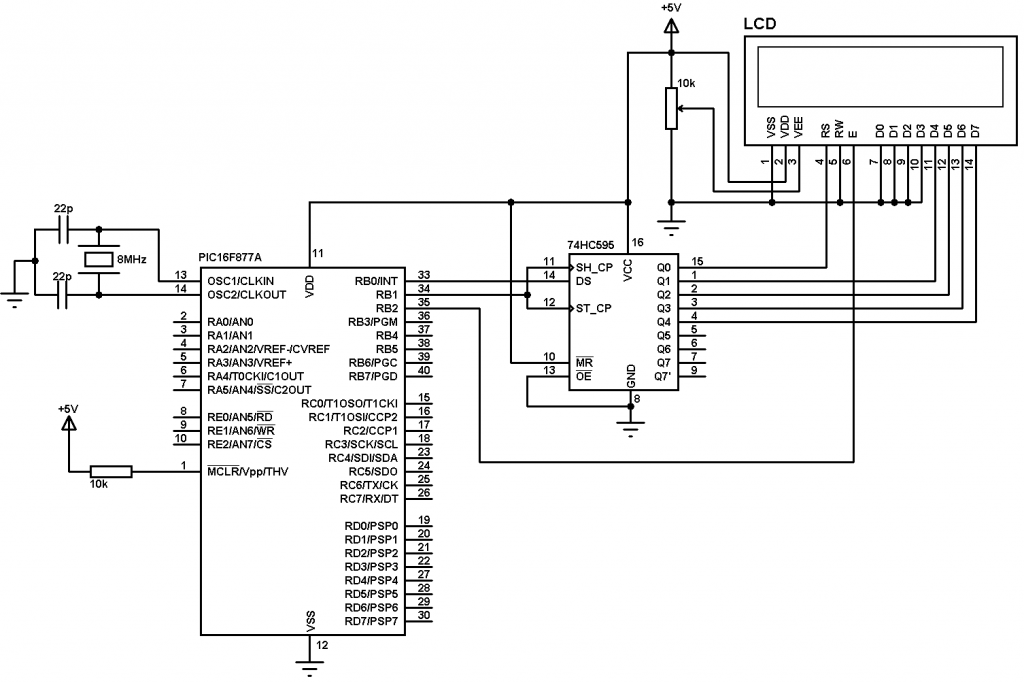
Interfacing PIC16F877A with 3-wire LCD circuit:
The following image shows project circuit schematic. The shift register data line is connected to RB0 pin and the clock line is connected to RB1 pin. LCDs enable pin is connected to pin RB3.
The LCD can be 1602 or 2004 or any compatible LCD.
Interfacing PIC16F877A with 3-wire LCD CCS C code:
1 2 3 4 5 6 7 8 9 10 11 12 13 14 15 16 17 18 19 20 21 22 23 24 25 26 27 28 29 30 31 | // Interfacing PIC16F877A with 3-wire LCD CCS C code //LCD module connections #define LCD_DATA_PIN PIN_B0 #define LCD_CLOCK_PIN PIN_B1 #define LCD_EN_PIN PIN_B2 //End LCD module connections #include <16F877A.h> #fuses HS,NOWDT,NOPROTECT,NOLVP #use delay(clock = 8000000) #include <3WireLCD.c> unsigned int8 i; void main(){ lcd_initialize(); // Initialize LCD module lcd_cmd(LCD_CLEAR); // Clear the LCD lcd_goto(3, 1); // Go to column 3 row 1 printf(lcd_out, "Hello world!"); lcd_goto(4, 2); // Go to column 4 row 2 printf(lcd_out, "3-Wire LCD"); lcd_goto(4, 3); // Go to column 4 row 3 printf(lcd_out, "PIC16F877A"); delay_ms(5000); while(TRUE){ i++; lcd_goto(7, 4); // Go to column 7 row 4 printf(lcd_out,"%3u",i); // Write i with 3 numbers max delay_ms(500); } } |
Interfacing PIC16F877A with 3-wire LCD video:
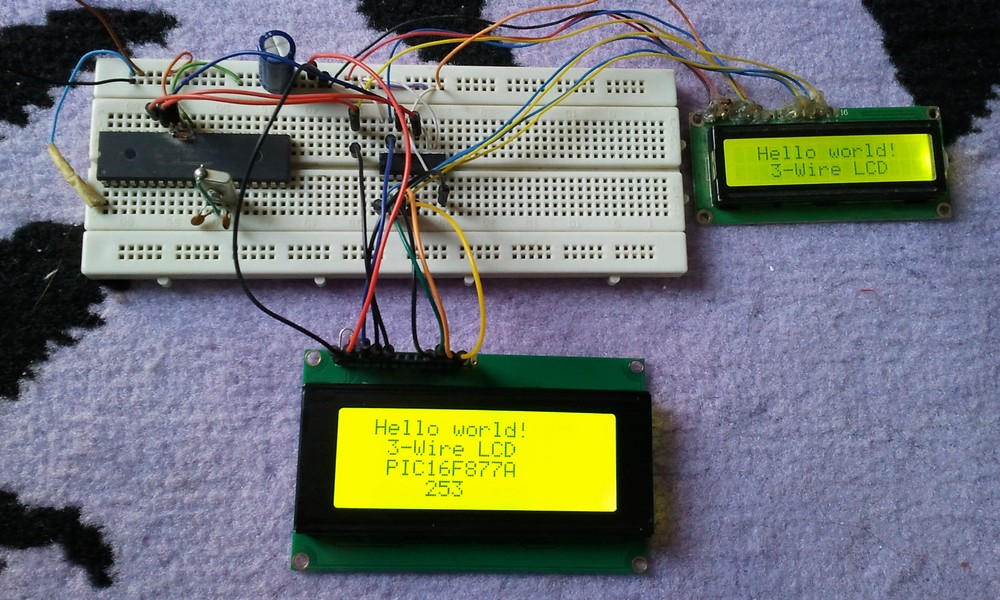
The following video shows a prototype hardware circuit of the project where a two LCDs (1602 and 2004) are used and connected in parallel.
Discover more from Simple Circuit
Subscribe to get the latest posts sent to your email.
