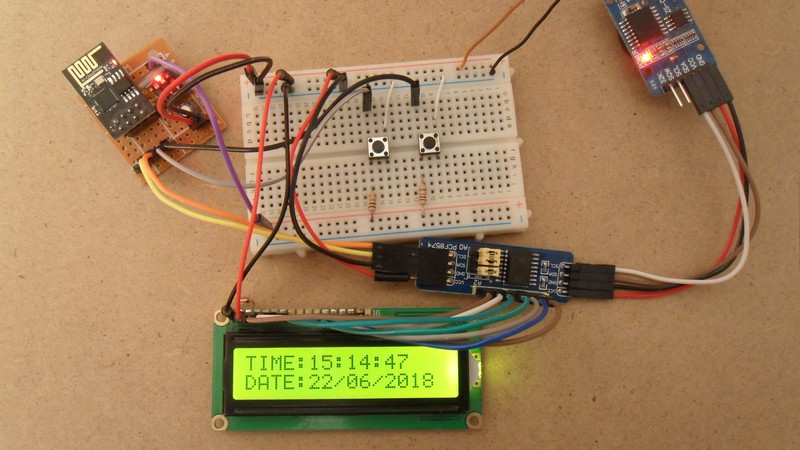
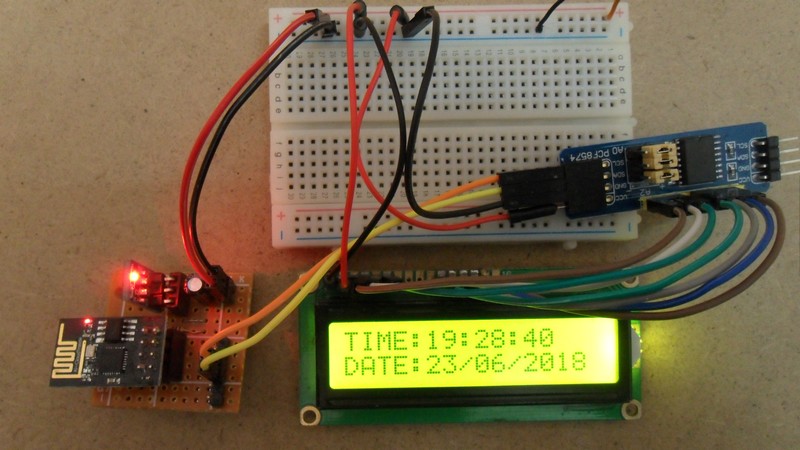
This post shows how to build a real time clock using ESP8266 (ESP-01) module, DS3231 RTC or DS1307 RTC and 16×2 LCD. Time and date are displayed on the 16×2 LCD screen and they (time and date) can be set with 2 push buttons.
As known the ESP-01 module has 8 pins of which 4 can be used as I/O (Input/Output) pins. In this project all the I/O pins will be used, and due to the number of I/O pins I’m going to use an I2C LCD which provided with PCF8574 I/O expander. So, the I2C LCD will take 2 pins (SDA and SCL) and each button will take 1 pin.
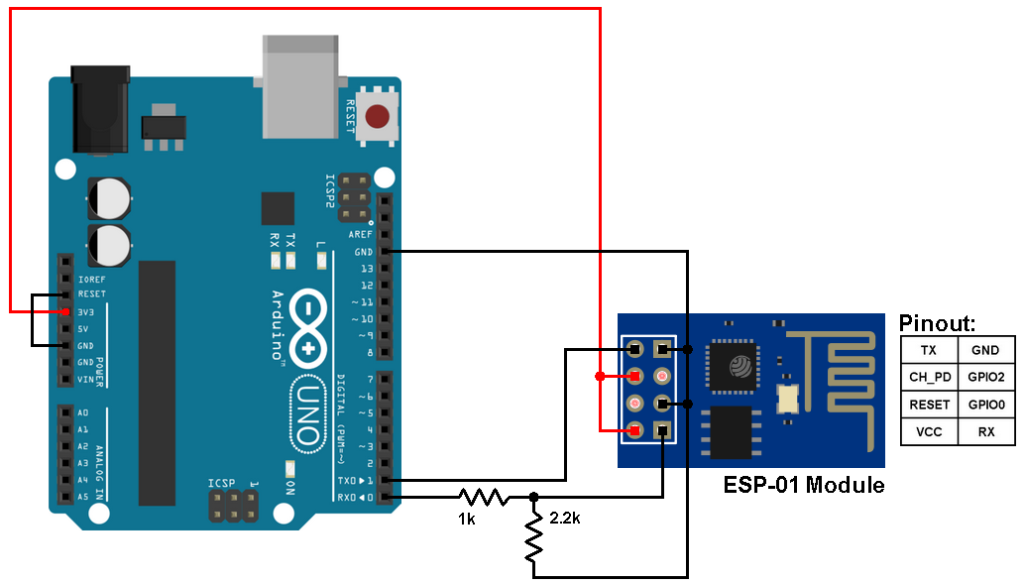
If you want to see how to use the ESP-01 module for the first time, how to use it with Arduino IDE and how to program (upload sketches) it with Arduino, visit the following topic:
ESP8266 WiFi module programming with Arduino UNO board
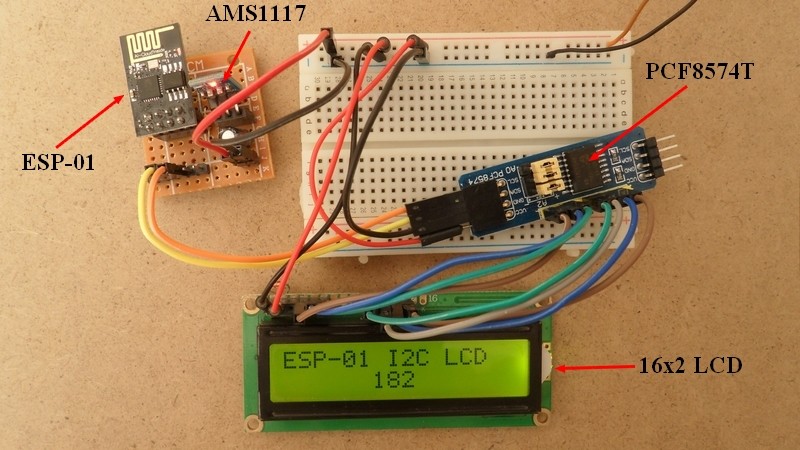
Also, the page below shows how to interface the ESP-01 module with I2C LCD:
Interfacing ESP8266 ESP-01 module with I2C LCD
Both DS3231 and DS1307 can be used in this project, the DS3231 is more accurate.
Hardware Required:
The components required for this project are listed below.
- ESP8266 ESP-01 module
- DS3231 (or DS1307) board
- 16×2 LCD screen
- PCF8574 I/O expander (or PCF8574A) — PCF8574 datasheet
- AMS1117 3V3 voltage regulator
- 2 x pushbutton
- 10uF capacitor
- 0.1uF (100nF) ceramic capacitor
- 7 x 10k ohm resistor
- 330 ohm resistor
- 10k ohm variable resistor or potentiometer
- 3V coin cell battery
- 5V source
- Breadboard
- Jumper wires
The Circuit:
Project circuit diagram is shown below.
The DS3231 board is shown in the circuit diagram, the DS1307 board has the same pin names and should be connected as the DS3231 board.
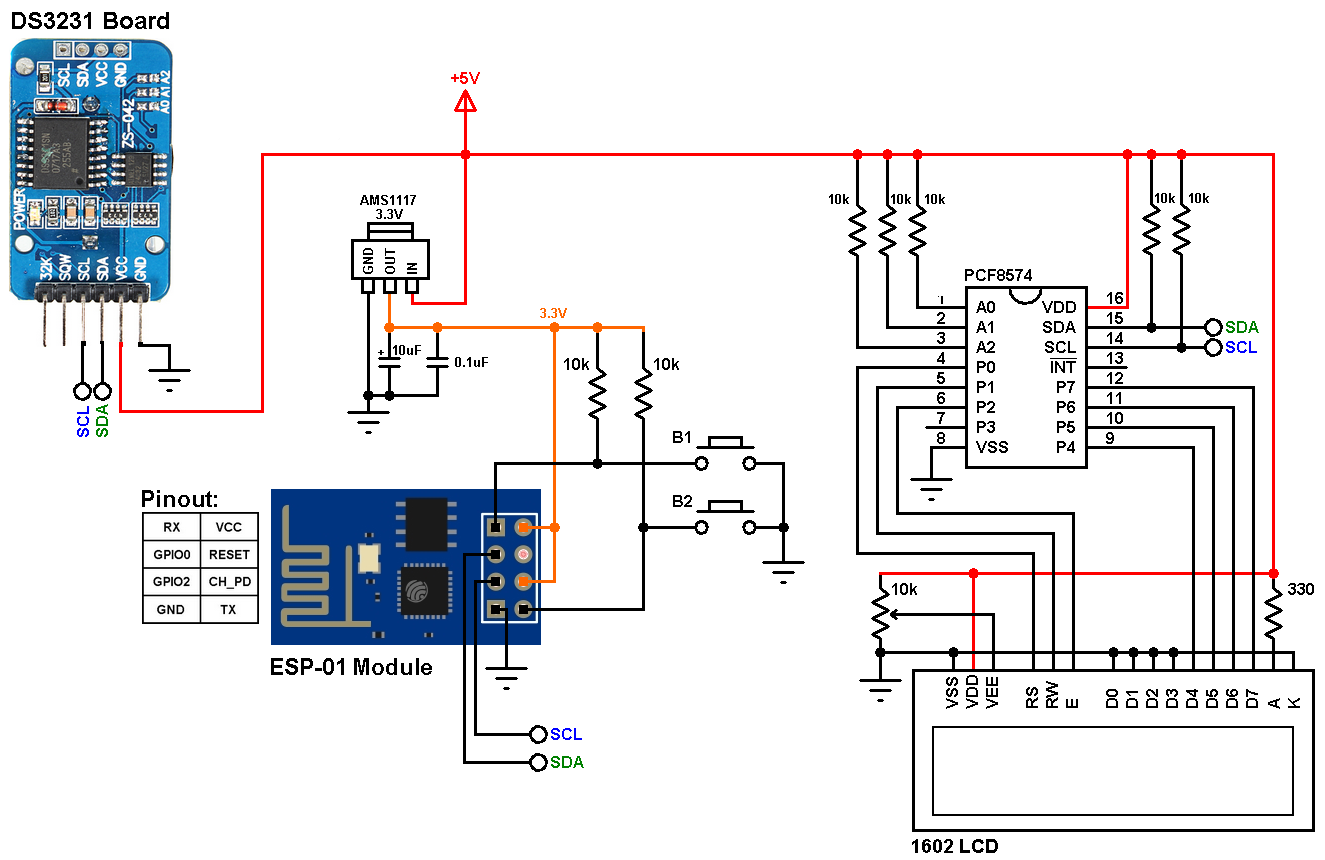
(All grounded terminals are connected together)
The I2C LCD and the DS3231 RTC board (or DS1307) share the same I2C bus which means the SDA line of the I2C LCD (presented by PCF8574) and the DS3231 RTC chip are connected together with GPIO0 of the ESP-01 module, the SCL line of the I2C LCD and the DS3231 are connected together with GPIO2 of the ESP-01 module.
The DS3231 RTC board and the I2C LCD (with PCF8574) are supplied with 5V, the ESP-01 module is supplied with 3.3V through the AMS1117 3V3 voltage regulator, this regulator steps down the 5V into 3.3V.
The two push buttons in the circuit are used to set time and date of the real time clock, button 1 (B1) is connected to RX pin (GPIO3) and button 2 (B2) is connected to TX pin (GPIO1) of the ESP-01 module.
The Code:
The code below works with DS3231 and DS1307 without any modification and it doesn’t use any library for the real time clock chip (DS3231 or DS1307).
I2C LCD and DS3231 RTC share the same I2C bus and the ESP8266 communicates only with 1 device at a time depending on the address, the I2C LCD address is 0x27 and the DS3231 (and DS1307) address is 0x68.
To be able to compile the code, we need a library for the I2C LCD which works with the ESP-01 module, download links are below:
LiquidCrystal_I2C Library — direct link
1 2 3 4 5 6 7 8 9 10 11 12 13 14 15 16 17 18 19 20 21 22 23 24 25 26 27 28 29 30 31 32 33 34 35 36 37 38 39 40 41 42 43 44 45 46 47 48 49 50 51 52 53 54 55 56 57 58 59 60 61 62 63 64 65 66 67 68 69 70 71 72 73 74 75 76 77 78 79 80 81 82 83 84 85 86 87 88 89 90 91 92 93 94 95 96 97 98 99 100 101 102 103 104 105 106 107 108 109 110 111 112 113 114 115 116 117 118 119 120 121 122 123 124 125 126 127 128 129 130 131 132 133 134 135 136 137 138 139 140 141 142 143 144 145 146 147 | // Real time clock with ESP8266 (ESP-01) module, DS3231 RTC and I2C LCD // This code also works with DS1307 RTC #include <Wire.h> // Include Wire library (required for I2C devices) #include <LiquidCrystal_I2C.h> // Include LiquidCrystal_I2C library LiquidCrystal_I2C lcd(0x27, 16, 2); // Configure LiquidCrystal_I2C library with 0x27 address, 16 columns and 2 rows #define button1 3 // Button B1 is connected to GPIO3 (RX) #define button2 1 // Button B2 is connected to GPIO1 (TX) void setup() { pinMode(button1, INPUT); pinMode(button2, INPUT); delay(1000); lcd.begin(0, 2); // Initialize I2C LCD module (SDA = GPIO0, SCL = GPIO2) lcd.backlight(); // Turn backlight ON } char Time[] = "TIME: : : "; char Calendar[] = "DATE: / /20 "; byte i, second, minute, hour, date, month, year; void DS3231_display(){ // Convert BCD to decimal second = (second >> 4) * 10 + (second & 0x0F); minute = (minute >> 4) * 10 + (minute & 0x0F); hour = (hour >> 4) * 10 + (hour & 0x0F); date = (date >> 4) * 10 + (date & 0x0F); month = (month >> 4) * 10 + (month & 0x0F); year = (year >> 4) * 10 + (year & 0x0F); // End conversion Time[12] = second % 10 + 48; Time[11] = second / 10 + 48; Time[9] = minute % 10 + 48; Time[8] = minute / 10 + 48; Time[6] = hour % 10 + 48; Time[5] = hour / 10 + 48; Calendar[14] = year % 10 + 48; Calendar[13] = year / 10 + 48; Calendar[9] = month % 10 + 48; Calendar[8] = month / 10 + 48; Calendar[6] = date % 10 + 48; Calendar[5] = date / 10 + 48; lcd.setCursor(0, 0); lcd.print(Time); // Display time lcd.setCursor(0, 1); lcd.print(Calendar); // Display calendar } void blink_parameter(){ byte j = 0; while(j < 10 && digitalRead(button1) && digitalRead(button2)){ j++; delay(25); } } byte edit(byte x, byte y, byte parameter){ char text[3]; while(!digitalRead(button1)); // Wait until button1 released while(true){ while(!digitalRead(button2)){ // If button2 is pressed parameter++; if(i == 0 && parameter > 23) // If hours > 23 ==> hours = 0 parameter = 0; if(i == 1 && parameter > 59) // If minutes > 59 ==> minutes = 0 parameter = 0; if(i == 2 && parameter > 31) // If date > 31 ==> date = 1 parameter = 1; if(i == 3 && parameter > 12) // If month > 12 ==> month = 1 parameter = 1; if(i == 4 && parameter > 99) // If year > 99 ==> year = 0 parameter = 0; sprintf(text,"%02u", parameter); lcd.setCursor(x, y); lcd.print(text); delay(200); // Wait 200ms } lcd.setCursor(x, y); lcd.print(" "); // Display two spaces blink_parameter(); sprintf(text,"%02u", parameter); lcd.setCursor(x, y); lcd.print(text); blink_parameter(); if(!digitalRead(button1)){ // If button1 is pressed i++; // Increament 'i' for the next parameter return parameter; // Return parameter value and exit } } } void loop() { if(!digitalRead(button1)){ // If button1 is pressed i = 0; hour = edit(5, 0, hour); minute = edit(8, 0, minute); date = edit(5, 1, date); month = edit(8, 1, month); year = edit(13, 1, year); // Convert decimal to BCD minute = ((minute / 10) << 4) + (minute % 10); hour = ((hour / 10) << 4) + (hour % 10); date = ((date / 10) << 4) + (date % 10); month = ((month / 10) << 4) + (month % 10); year = ((year / 10) << 4) + (year % 10); // End conversion // Write data to DS3231 RTC Wire.beginTransmission(0x68); // Start I2C protocol with DS3231 address Wire.write(0); // Send register address Wire.write(0); // Reset sesonds and start oscillator Wire.write(minute); // Write minute Wire.write(hour); // Write hour Wire.write(1); // Write day (not used) Wire.write(date); // Write date Wire.write(month); // Write month Wire.write(year); // Write year Wire.endTransmission(); // Stop transmission and release the I2C bus delay(200); // Wait 200ms } Wire.beginTransmission(0x68); // Start I2C protocol with DS3231 address Wire.write(0); // Send register address Wire.endTransmission(false); // I2C restart Wire.requestFrom(0x68, 7); // Request 7 bytes from DS3231 and release I2C bus at end of reading second = Wire.read(); // Read seconds from register 0 minute = Wire.read(); // Read minuts from register 1 hour = Wire.read(); // Read hour from register 2 Wire.read(); // Read day from register 3 (not used) date = Wire.read(); // Read date from register 4 month = Wire.read(); // Read month from register 5 year = Wire.read(); // Read year from register 6 DS3231_display(); // Diaplay time & calendar delay(50); // Wait 50ms } |
Finally, the small video below shows my prototype circuit result:
Discover more from Simple Circuit
Subscribe to get the latest posts sent to your email.
This is an old post … so I apologize for the late comment. What Ahmed is writing is that if you power the DS3231 from 5V the SDA SCL lines will have values between 0 and 5V for the clock module but 0 – 3.3V for the ESP. Usually you need 0.7xVcc to detect a stable high logic level. That is 3.5V for the DS, but only 3.3V max for the ESP. So it is pure luck for this circuit to work, depending on the tolerance of the components. You may also damage the ESP if yours is not 5V tolerant as they usually aren’t.
Can someone tell me why + 48 for both Time[6] = hour % 10 + 48; Time[5] = hour / 10 + 48;
Thank you for sharing this informations, but you don’t use I2c in you schematic circuit.
And how can you Running both 5v ( DS3231) and 3.3v (ESP01) devices on the same I2C ?
This circuit uses the conventions of I2C SCL and SDA in the LCD and in the RTC, VCC and GND of the two go to 5V and GND of the circuit
Ahmed, you really need to read up about I2C before commenting. It is a bus. So you can have multiple I2C devices on this bus, as long as each device has a unique address. And pin 14 and 15 of the ESP are clearly labelled SDA and SCL, these go to equally clearly-labelled pins on both the RTC and the LCD.